

How To Repair Fascia On House
I accept "muddled through" many home renovation projects and enjoy sharing my discoveries of how (not) to practice it yourself.
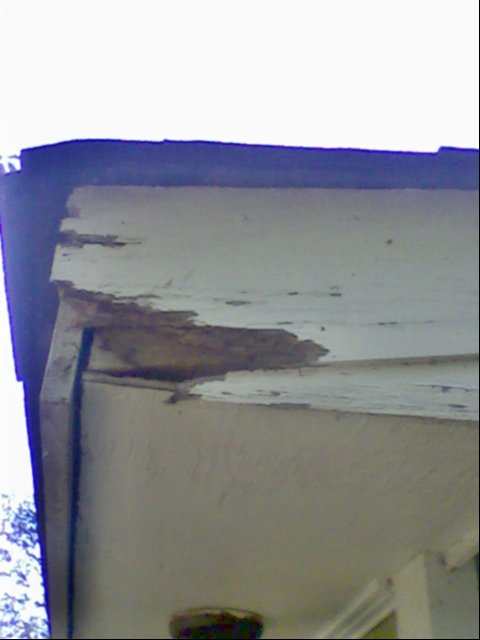
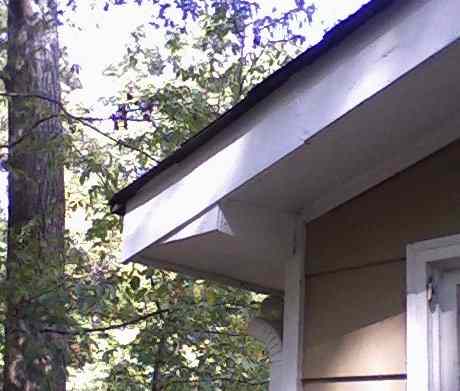
The obligatory "before" motion-picture show. The corner of the fascia board has rotted abroad.
Soffit and Fascia
Eaves are a vulnerable part of your house, exposed to weather and impairment by falling limbs. Luckily, they aren't too difficult to repair when the inevitable happens and repair is needed. So, if your eaves are wooden, and y'all have some damage to your fascia board to deal with, and so let's wait at the process.
"Fascia?"
That'south the name for the vertical board or panel on the front of your eaves. Its complement is the "soffit"—the board that forms the lesser of the structure—and technically, that's the simply office that'southward actually supposed to exist chosen the "eave."
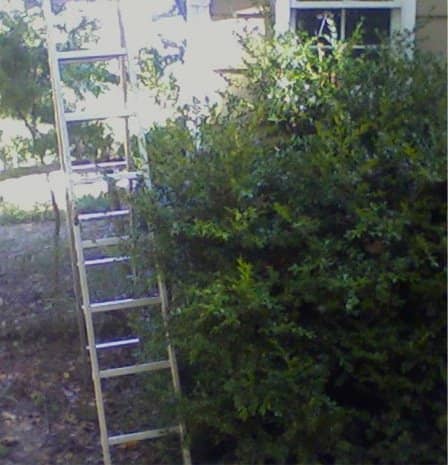
The first thing is getting to the eaves, which means having to use a ladder. That's the unsafe role, peculiarly if the ground where you need to work is uneven or sloping. It'due south important to find or create an fifty-fifty level surface for the ladder; the photos below show what I had to practice to reach that goal.
How to Repair Fascia Boards
Remove the Impairment
Once you are up the ladder, you need to remove the damaged part of the board. In this instance, it was easy because the damaged section of the board was already curt. But if you have impairment to a long department of fascia lath, you lot may cull to replace just the damaged portion. That's not easy, because the demand to protect the roof decking itself makes it hard to make a complete cut across the fascia board. A reciprocating saw—sometimes referred to every bit a "Sawzall"—is probably your best option.
Hither, all I had to practise was to pry the damaged lath away. This task is much easier if you accept a good pry bar, such as the one shown below. I was duly grateful.

Pry bar, slightly romanticized.
Fabricate the Replacement Pieces
In one case the damaged board is removed, you are set to begin fabricating the replacement pieces. Often that will just mean the main fascia board itself. The common board in use for this purpose in N America is 1 inch thick by half dozen inches wide (the actual dimensions are smaller).
In this example, though, there was also a thinner triangular piece capping the stop of the eave structure. I refer to this—correctly or not—as a "fillet." It's made of quarter-inch-thick plywood.

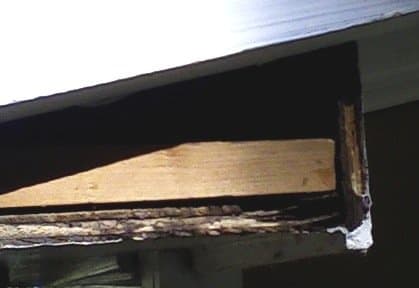
Repair area cleared of bad wood and gear up to go.
If you're replacing a corner piece, the easiest style to measure the angle y'all demand is to use the one-time board as a template. You can do this even if, as was the case in the repair shown, the erstwhile board doesn't accept a clean, complete edge due to the damage suffered. But employ a straightedge to create the directly line you need, as shown beneath.
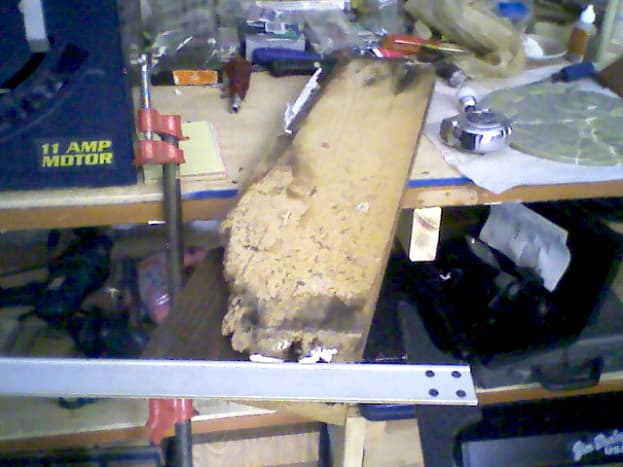
This raises an interesting question. If you look at the closeup of the original lath below, you can come across that it was cutting with a 45-degree angle edge at the corner. That is the norm for professional work. That way, at that place is no exposed end-grain, and the appearance of the corner is equally nifty every bit information technology can possibly be.
However, for an amateur, achieving a adept 45-degree join at the corner can be challenging, as it involves cutting angles accurately in 2 dimensions. If you have the tools and technique, by all means, go for information technology!
Roll to Continue
Read More From Dengarden
But I chose to avoid this challenge by using barrel joints at the corners, allowing me to utilize foursquare (90-degree) cuts. That leaves a board with an exposed edge, of form, but by making a clean cut and finishing information technology thoroughly, I hope that vulnerability to weathering won't increase also much. This is peradventure an instance of how not to do it—but I don't intendance if a professional person of twenty years snickers at me.
(By the style, y'all can see the xc-caste edge of the previously-replaced fascia board on the adjoining wall in the picture above. That was really the point at which I decided to go with butt joints.)


Paint, Paint, Pigment!
Once the board is cut to fit, paint it. I believe in painting both faces of the board to improve protect it from moisture and insects, though contractors will usually only paint the outside. I use a primer/sealer, such equally "Kilz," covering the exterior face up only with a top coat of trim paint.

One expanse where my work is arguably superior: I paint both surfaces of the replacement board, not just the exposed face. Hither the paint dries, supported on a stepladder.

Hither's the fascia board nailed in place, waiting for its finish coat. The scars on the primer glaze are small enough not to exist a real problem, and they are almost inevitable from the nailing process. Impairment to paint will be covered with a finish glaze
Replace the 'Fillet'
The adjacent step is to supervene upon the fillet. Y'all can apply a piece of cardboard to create a template or pattern to fill the space. I really drew directly on the flake slice of plywood used for the repair, but that is harder in some ways, as it's easy to confuse the orientation of the slice. I ended up with a couple of minor inaccuracies in fit, only decided they weren't plenty to justify a 2nd effort.
Pigment the piece, as you did for the fascia board, and and so install information technology. Looking at the structure I had led me to two conclusions about the installation. First, I didn't desire to pound nails and peradventure damage the soffit; and second, I wanted to reinforce the construction of the eave so I wouldn't have to do another repair later. Reinforcement would likewise make installation of the fillet much easier.
That reinforcement takes the form of what I call a "crossbar block." It'southward just a piece of ane" ten ii," cut to length. Information technology'due south attached to the soffit lath and the backing board with a couple of screws, and it gives a solid piece to which the fillet volition be fastened in turn. The photos below bear witness the process.

The fillet board is secured with a couple of finishing screws, every bit shown beneath. The inaccuracies are visible in this close-up just won't be noticeable from the ground when sealed and painted.
Seal It Together
Seal joints with a paintable sealant, both for a smooth end appearance and to keep moisture out. I used a good-quality latex product.
The shut-upwards below shows the joint with the next section of fascia, but of course all joints should be sealed—that with the fillet, with the soffit, and at the corner of the eave also. Once it has dried, you are ready to paint!

Use a good quality sealant—in this instance I used a latex conception—to seal the joints and cover small-scale imperfections. Make sure the sealant is paintable!
Finishing Touches
The sealed project is finished with a trim paint—in my example, a gloss white latex enamel. You lot and I know that in that location were imperfections along the style. But equally you tin can meet, the project looks good and should last a good many years.
Of course, if I don't want to have to do more fascia repair, I need to go cracking on repainting the "good" fascia and soffit so that they don't deteriorate, too! And while I'm at it, I'd better remove that disused downpipe yous can see, still strapped to the wall at the corner.
Hmm, can that be an article, too?
The obligatory "after" picture. Sweet satisfaction!
This article is accurate and true to the all-time of the writer'southward cognition. Content is for informational or entertainment purposes only and does non substitute for personal counsel or professional advice in business organization, financial, legal, or technical matters.
Medico Snow (author) from Camden, South Carolina on September 19, 2022:
As I call back, it was semi. I have read the same as yous--and I'd add that there's a reason people similar to utilize gloss in kitchens!
Ronny on September 19, 2022:
What kind of pigment did you apply? Flat, matte, or semi gloss? I know it can be a personal choice for many, just I've likewise read that flat paint is harder to clean.
AJOY ADHIKARI on June 25, 2022:
I don't call back detailing too much to the customer really helps you. Go on information technology short & sugariness. You will get ameliorate.
Doc Snowfall (author) from Camden, Southward Carolina on November 06, 2022:
Sounds like a swell tip, thanks! I'g presuming that the West systems filler does aggrandize and contract more like real forest, then?
Coat on Nov 06, 2022:
Problem with bondo and other body fillers is that they dont expand and contract with the wood during the changing seasons. And once it starts nifty, there is the entry point for water and the damage starts all over again. I too use a liquid epoxy mixed with a filler agent such as what Westward Systems offers for all the joints and areas that demand filler to close the gap. Easily sandable and very stiff secure joints that looks seamless for years to come.
Medico Snowfall (author) from Camden, S Carolina on September 22, 2022:
Cheers for that. I've observed a like solution in use past some local pros--to set up damaged siding without replacing a board, they applied skilful old Bondo, straight from the automobile shop, sanded and painted. Completely invisible--and probably a lot more than durable than the board information technology'south patching.
Neil on September 16, 2022:
Liquid epoxy is a good solution to the exposed end grain. I employ it even when I take proper miters.
Doc Snow (author) from Camden, South Carolina on August 25, 2022:
Thanks for the tip, Tim. I know a lot of readers will capeesh information technology!
Timthetoolman on August 24, 2022:
Did a soffit repair for the first time. FYI - soffit is just i/8" plywood with a veneer rolled on. Oh, you tin can really buy real soffit merely it is fabricated of some weird textile that you must use a carbon tipped sawblade to cutting. So, to keep things elementary -- go with the ane/8" plywood and purchase a roll of the wood veneer. It really words pretty well.
Doc Snowfall (author) from Camden, S Carolina on January 21, 2022:
Sounds like a good play a joke on. In that location's also a Hardie plank composite lath now available for soffit. I'thou not sure if they also have something that would be suitable for fascia. If and then, it would exist 'bombproof' every bit far as rot goes, albeit it's a fleck of a pain to work with in some ways.
Coincidentally, this afternoon should run into me using a couple of Hardie soffit planks to replace some deteriorated lap siding. It'due south a pretty good match for what'southward on there--a little thinner than the original, but with a apparently cease that seems fairly hard to find in a 12" lath.
Eugene Brennan from Ireland on January 21, 2022:
Good advice, and voted upwards!
I've had to do this several times, in our climate timber doesn't last long unless it's hardwood or pressure treated softwood which has been primed, and carefully painted.
I ordinarily saturate the cut cease of the existing fascia board and all the new section with forest preservative. Because its so watery, it keeps soaking in and probably prevents whatever further rot.
Doc Snow (author) from Camden, Southward Carolina on September 27, 2022:
Sure. In fact, you'd have difficulty (I doubtable *not bad* difficulty) sourcing such long boards. Merely join them neatly and they'll look fine.
TIM on September 26, 2022:
I am replacing a 25 human foot run of fascia board is information technology ok to utilize shorter boards to brand it easier to handle?
Dr. Snow (author) from Camden, South Carolina on September 17, 2022:
I'thou not sure whether or non I understand your situation correctly. Is your "triangle signal" like to what I'm calling the "fillet?"
If so, I installed the fillet butted to the front of the plywood soffit boards, using a batten cake to provide good nailing surfaces in each direction. That's shown in the 4th-terminal set of photos.
Only perhaps your question isn't about that? I'll aid if I can; maybe you would similar to e-mail me a photograph of the pieces you lot're concerned nigh? You tin can do that via my Hubpages profile folio, if and then. Of grade y'all're likewise welcome to elaborate here, if you similar.
Either manner, thanks for your comment, and proficient luck with your projection!
ml on September 17, 2022:
The instructions and pictures were very helpful....I was hoping for teaching of the whole lath...upwards to the triangle point, the original 1x6" is not real forest, information technology has deteriorated (1974 business firm) and the eave center triangle piece has pulled away from the 1x6" and is hanging on the center shelf board, which was pieced together instead of one long shelf board(probably another reason this trouble happened.) Mainly I'g needing to know if the triangle slice sits behind/in forepart/or flush up against the existing wood triangle frame. I've removed all the (non)wood 1x6 and am ready to replace with real wood, but unsure how to lucifer it up and fasten it to the triangle piece that the 2 1x6"'s come across together. cheers if yous canhelp.
Doc Snow (writer) from Camden, Southward Carolina on November 03, 2022:
You're very welcome, nick--I appreciate your comment.
nick on Nov 03, 2022:
thanks helpful commodity
Doc Snow (author) from Camden, Due south Carolina on October 14, 2022:
Well, once once more, thank you for stopping by!
Hello, hi, from London, UK on October 14, 2022:
I tin can't answer your questions because I am non a handyman just I enjoyed reading y'all hub which was very comprehensive.
Physician Snow (writer) from Camden, Due south Carolina on October fourteen, 2022:
So what exercise you think? Should I take sucked it upward and gone for bevelled edges at the corner? Was my ladder technique totally foolhardy? Or--against all odds--did you really learn something useful here?
And how about your adventures in home repair? Let united states of america know. . . we have inquiring minds!

Source: https://dengarden.com/home-improvement/How-Not-To-Fix-Your-Eaves-Fascia
Posted by: bennettnathat.blogspot.com
0 Response to "How To Repair Fascia On House"
Post a Comment